
코드캐더미로 배우는 레일즈 기초 1부에 이어서 두 개의 모델을 가진 TravelApp을 만들어본다.
TravelApp
한 가지 종류 이상의 데이터를 가진 앱을 만들고 싶을 때 다른 컬럼을 갖기 때문에 하나의 모델로 기술하기에는 혼란스러울 수 있다. 대신 두 개 이상의 모델로 기술할 수 있다.
새로운 TravelApp앱을 만든다:
    rails new TravelApp
    cd TravelApp
Model
Tag와 Destination이라는 두 개의 모델을 만든다:
    rails generate model Tag
    rails generate model Destination
두 개의 모델 사이의 관계를 정의한다.
app/models/tag.rb에:
has_many :destination
app/models/destination.rb에
belongs_to :tag
has_many/belongs_to 쌍은 일대다 관계를 정의하기 위해 자주 쓰인다. 몇 가지를 예로 들면:
- a Library has many Books; a Book belongs to a Library : 책과 도서관
- an Album has many Photos; a Photo belongs to an Album : 사진과 앨범
- a Store has many Products; a Product belongs to a Store : 상품과 상점
db/migrate 안의 tags 테이블에 title과 image란 string 컬럼들을 추가한다:
t.string :title
t.string :image
destinations 테이블에 name, image, descripton이란 string 컬럼을 추가하고,
tags 테이블에 foreign key pointing을 추가하기위해 t.references :tag를 추가한다:
t.string :name
t.string :image
t.string :description
t.references :tag
rake db:migrate
db/seeds.rb에 데이터를 입력한다.
rake db:seed
controller, route, view
Tags 컨트롤러를 제너레이트한다.
rails generate controller Tags
config/routes.rb에 /tags 요청을 Tags 컨트롤러의 index 액션에 매핑하는 새로운 라우트를 추가한다:
get '/tags' => 'tags#index'
app/controllers/messages_controller.rb에 모든 태그 목록을 보여주는 index 액션을 추가한다:
def index
    @tags = Tag.all
end
뷰를 만들기 위해서 app/views/tags/index.html.erb를 만들고, 다음을 입력한다:
<div class="header">
  <div class="container">
    <img src="http://s3.amazonaws.com/codecademy-content/courses/learn-rails/img/logo-1tm.svg" width="80">
    <h1>BokenjiKan</h1>
  </div>
</div>

<div class="tags">
  <div class="container">
    <div class="cards row">
      <% @tags.each do |t| %>
      <div class="card col-xs-4">
        <%= image_tag t.image %>
        <h2><%= t.title %></h2>
        <%= link_to "Learn more", tag_path(t) %>
      </div>
      <% end %>
    </div>
  </div>
</div>
app/assets/stylesheets/application.css에 CSS를 입력한다:github
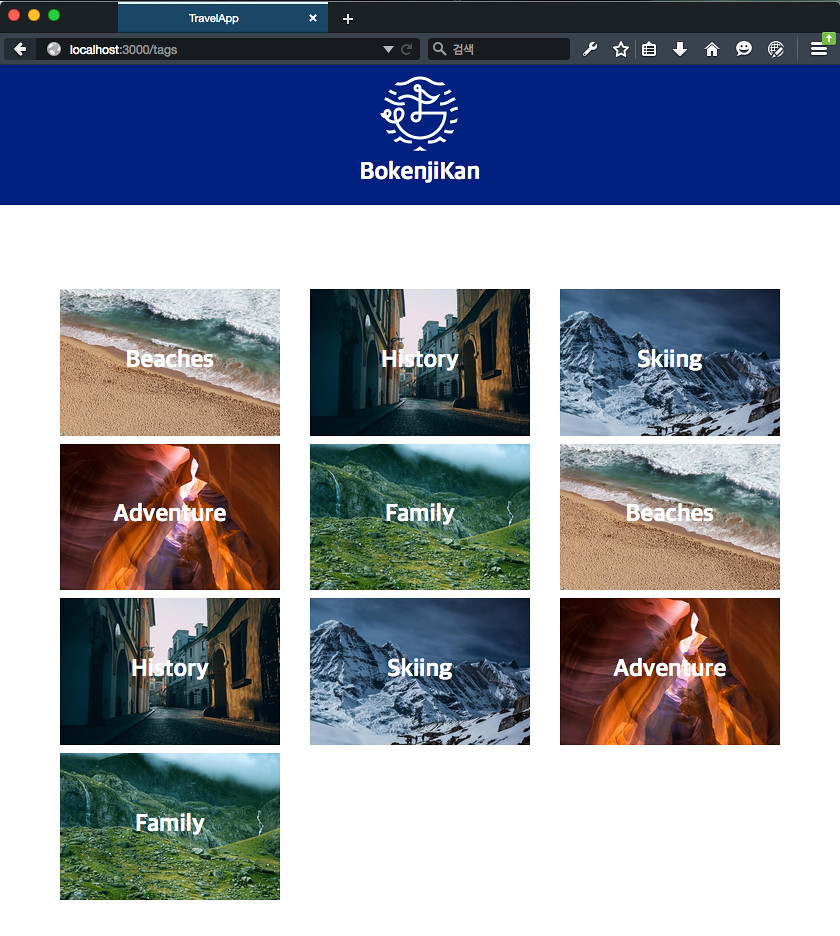
이제 http://localhost:8000/tags을 방문해서 TravelApp에 웹페이지를 요청한다.
이제 특정 태그를 보여주는 액션을 추가해보자. 7가지 표준 컨트롤러 액션 문서를 참조하고, 라우트 화일에 다음 라우트를 추가한다:
get '/tags/:id' => 'tags#show', as: :tag
이 라우트를 “tag”라고 부르기 위해 as:를 사용하였다.
app/views/tags/show.html.erb을 만든다:
<div class="header">
  <div class="container">
    <img src="http://s3.amazonaws.com/codecademy-content/courses/learn-rails/img/logo-1tm.svg" width="80">
    <h1>BokenjiKan</h1>
  </div>
</div>

<div class="tag">
  <div class="container">
    <h2><%= @tag.title %></h2>

    <div class="cards row">
      <% @destinations.each do |d| %>
      <div class="card col-xs-4">
        <%= image_tag d.image %>
        <h2><%= d.name %></h2>
        <p><%= d.description %></p>
      </div>
      <% end %>
    </div>

  </div>
</div>
app/views/tags/index.html.erb에 다음을 추가한다:
<%= link_to "Learn more", tag_path(t) %>
위에서 라우트에 “tag”라는 이름을 주었기 때문에, 레일즈는 tag_path라는 헬퍼 매서드를 자동으로 만든다. tag_path(t)는 특정 태그의 패스(예를 들면 /tag/1)로 URL을 제너레이트한다.
rails generate controller Destinatins
라우트 파일에 다음 라우트를 추가한다:
get '/destinations/:id' => 'destinations#show', as: :destination
Destinations 컨트롤러 파일에 show 액션을 추가한다:
def show
  @destination = Destination.find(params[:id])
end
뷰 파일 app/views/destinations/show.html.erb을 만들고, 목적지의 사진, 이름, 소개를 보여주도록 한다:
<div class="header">
  <div class="container">
    <img src="http://s3.amazonaws.com/codecademy-content/courses/learn-rails/img/logo-1tm.svg" width="80">
    <h1>BokenjiKan</h1>
  </div>
</div>

<div class="destination">
  <div class="container">
    <div class="row">
      <div class="col-xs-12">
        <%= image_tag @destination.image %>
        <h2><%= @destination.name %></h2>
        <p><%= @destination.description %></p>
      </div>
    </div>
  </div>
</div>
마지막으로 app/views/tags/show.html.erb에 다음을 추가한다:
<p><%= link_to "See more", destination_path(d) %></p>
- “See more”를 링크 텍스트로 준다.
-
show라우트를 “destination”는 이름을 주었기 때문에, 레일즈는destination_path라는 헬퍼 매서드를 자동으로 만든다. 특정 목적지의 패스를 URL로 제너레이트하기 위해destination_path를 사용한다.
이제 앱이 특정 목적지를 보여준다. 목적지의 이름과 설명을 업데이트하는 액션을 추가해보자. 7가지 표준 컨트롤러 액션 문서을 참조하면 edit과 update를 사용해야한다.
라우트 파일에 다음 라우트를 추가한다:
get '/destinations/:id/edit' => 'destinations#edit', as: :edit_destination
patch '/destinations/:id' => 'destinations#update'
Destinations 컨트롤러의 show 액션 밑에 edit 액션을 추가한다:
def edit
  @destination = Destination.find(params[:id])
end
edit 액션 밑에 destination_params라는 private 매서드를 추가한다:
private
  def destination_params
    params.require(:destination).permit(:name, :description)
  end
edit 액션과 private 매서드 사이에 update 액션을 추가한다:
def update
  @destination = Destination.find(params[:id])
  if @destination.update_attributes(destination_params)
    redirect_to(:action => 'show', :id => @destination.id)
  else
    render 'edit'
  end
end
app/views/destinations/edit.html.erb를 만들고 다음 코드를 입력한다:
<div class="header">
  <div class="container">
    <img src="http://s3.amazonaws.com/codecademy-content/courses/learn-rails/img/logo-1tm.svg" width="80">
    <h1>BokenjiKan</h1>
  </div>
</div>

<div class="destination">
  <div class="container">
    <%= image_tag @destination.image %>

    <%= form_for(@destination) do |f| %>
      <%= f.text_field :name %>
      <%= f.text_field :description %>
      <%= f.submit "Update", :class => "btn" %>
    <% end %>

  </div>
</div>
마지막으로 app/views/destinations/show.html.erb에 edit_destination_path와 link_to를 이용하여 링크를 만든다:
<%= link_to "Edit", edit_destination_path(@destination) %>
소스코드의 위치와 내용을 깃허브의 커밋 페이지에서 자세하게 볼 수 있게 올려놓았다.